Originally shared by Ray Hiltz
How to Create Custom Hangout Lower Thirds with iPiccy
(Click on album below for step by step guide)
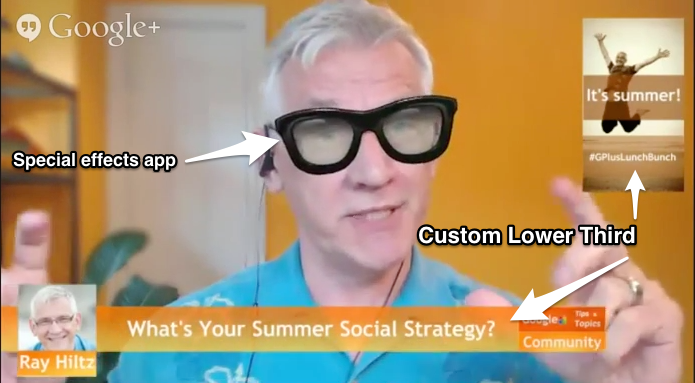
If you host or guest on a Google+ Hangout On Air, you’ve probably seen those “newsroom” like bars at the bottom of the screen identifying the person above it.
These bars are referred to as lower thirds.
Google+ Hangouts has a third party app called the Hangout Toolbox
This is the number one used Hangout app, which is not surprising due to its simplicity and features such as the ability to upload your brand logo and save your lower thirds as presets.
I've written a detailed article on my NewRayCom blog that includes a short video that shows you how to quickly add a Lower Third using the Hangout Toolbox.
You can read it here: http://goo.gl/6QqycV
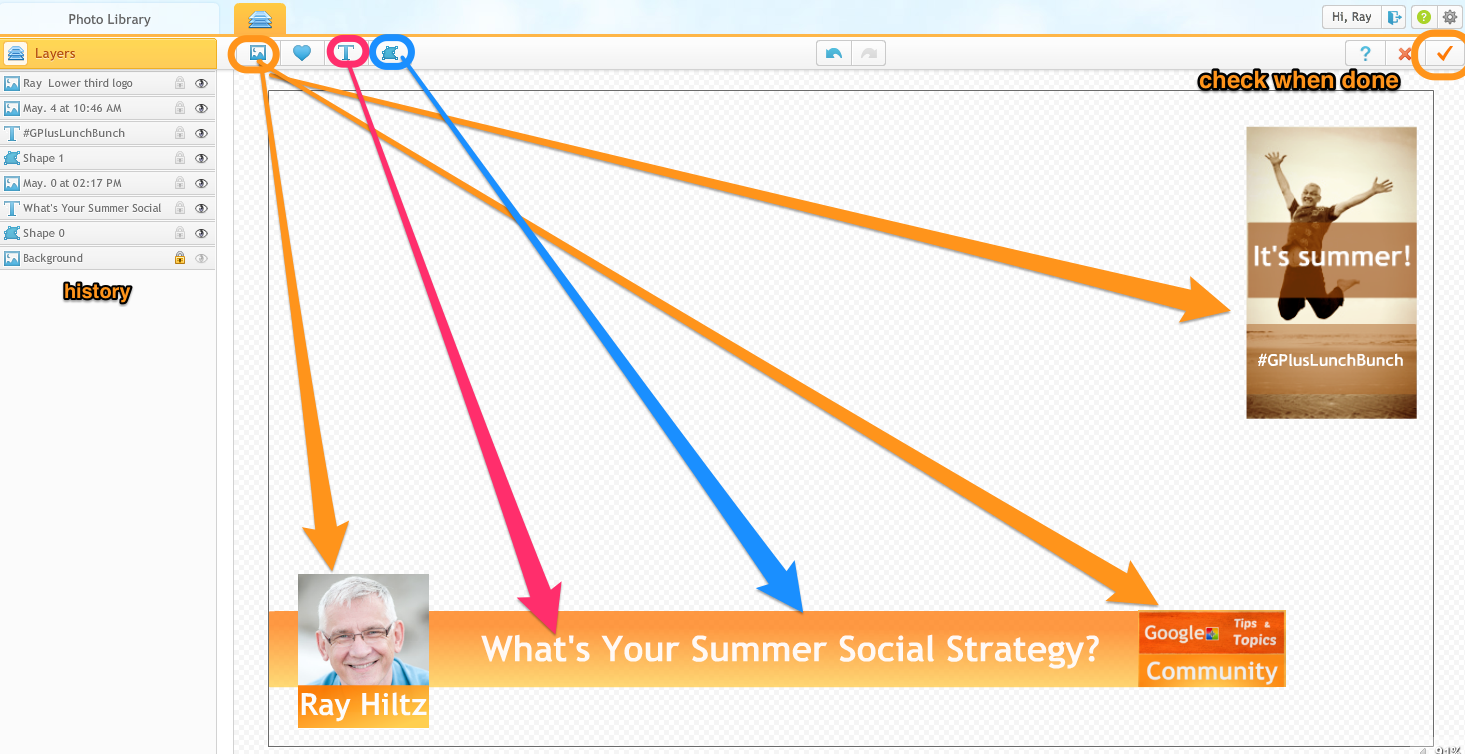
To take advantage of the great branding opportunities that Hangouts provide, I create custom Lower Thirds and Graphics using the free Chrome extension, iPiccy
There are many free photo editors available for those of us who are Photoshop challenged, but I always find myself going back to iPiccy for its ease of use and number of features.
I've included an album of my screen shots to make it easy for you to scan through. If you need more detail or want to watch the video, go to www.newraycom.com.
1, 2 - Download the iPiccy Chrome extension and "start editing".
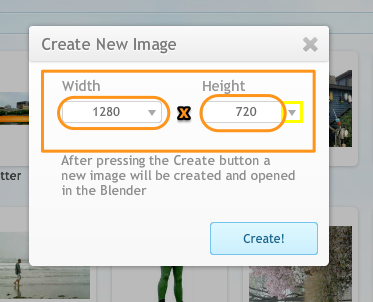
3. Click on the “more” option, then on “new image”.
4. The optimal size for a HD video is 1280px x 720px
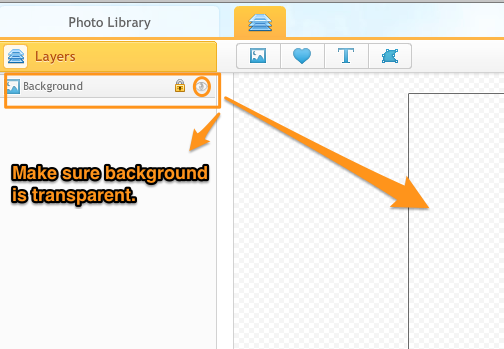
5. Make sure your background is transparent. (Then save as a .png file)
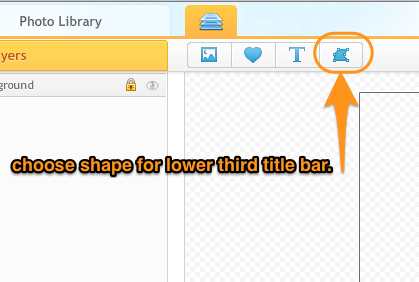
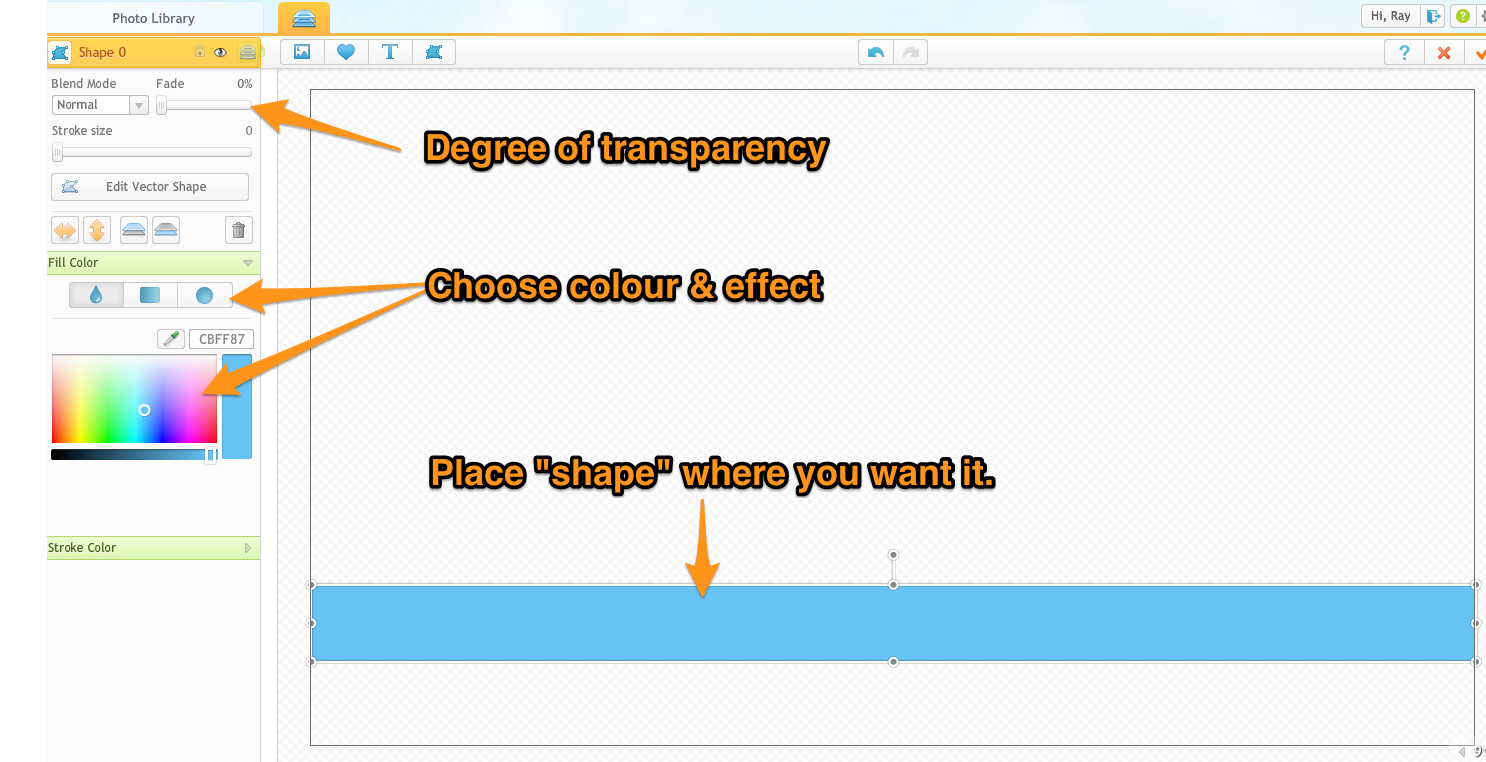
6. To create a typical “identification lower third bar”, I choose a rectangular shape after clicking the “shapes” icon.
7. Choose size and colour of banner.Select transparency. I usually around 20% works well. , effect and degree of transparency. I find 20% works well.
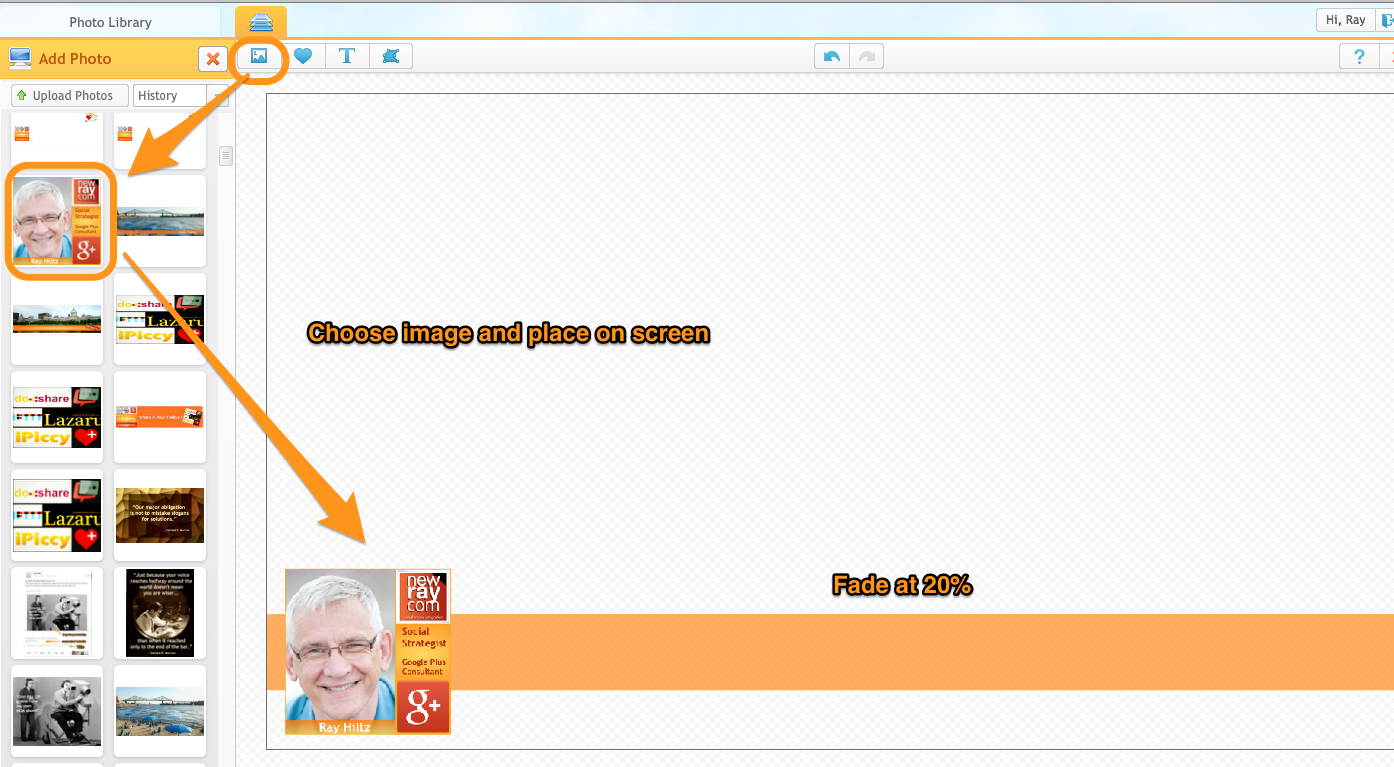
8. Import a brand logo or your profile image by clicking on the photo icon next to “add photo”. You can upload one from your computer or choose one that you’ve already uploaded.
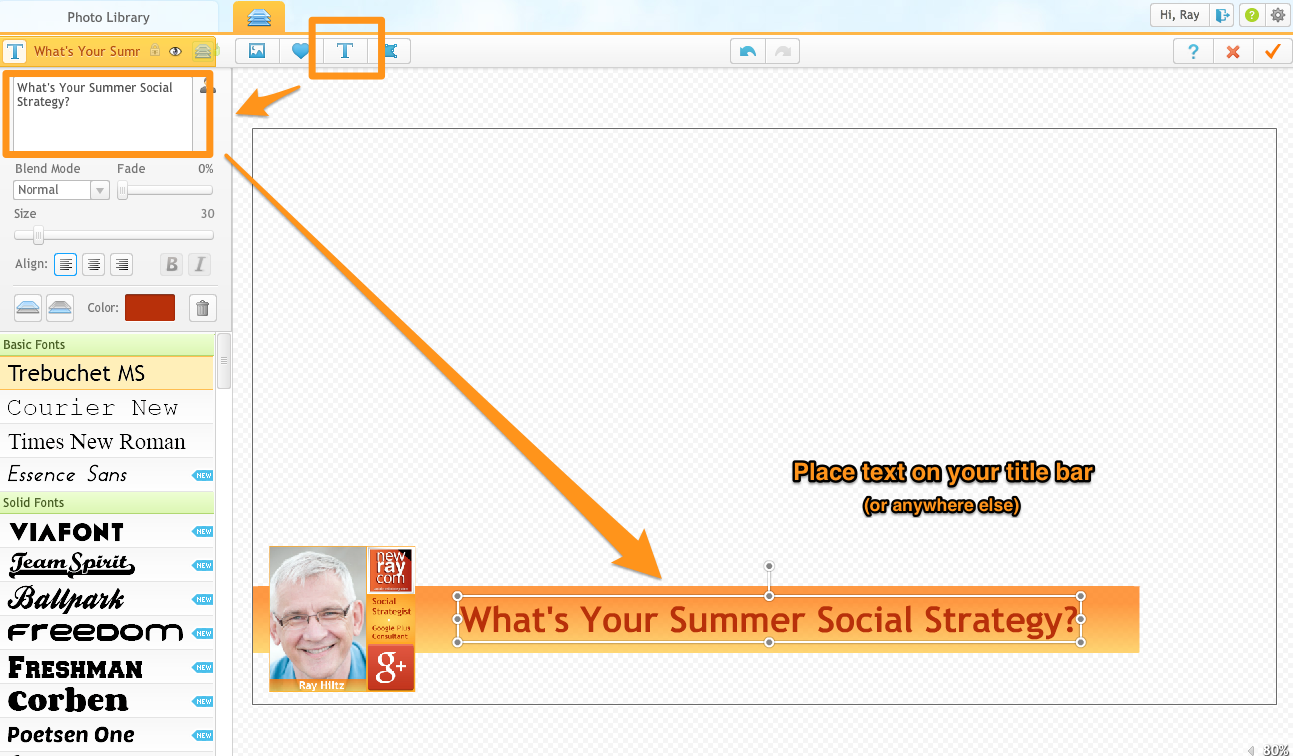
9. Add text to your lower third. (or anywhere else inside the view area). _Be careful your text or graphics don’t hide you. Best to keep them near the outside frame._
I keep graphics within a 200px frame on either side and 150px from the bottom.
10. You can add other images or add text. Again, be careful to allow enough "empty space" in the centre of your frame.
11. Click on the checkmark and save as a .png file to your hard or Google Drive.
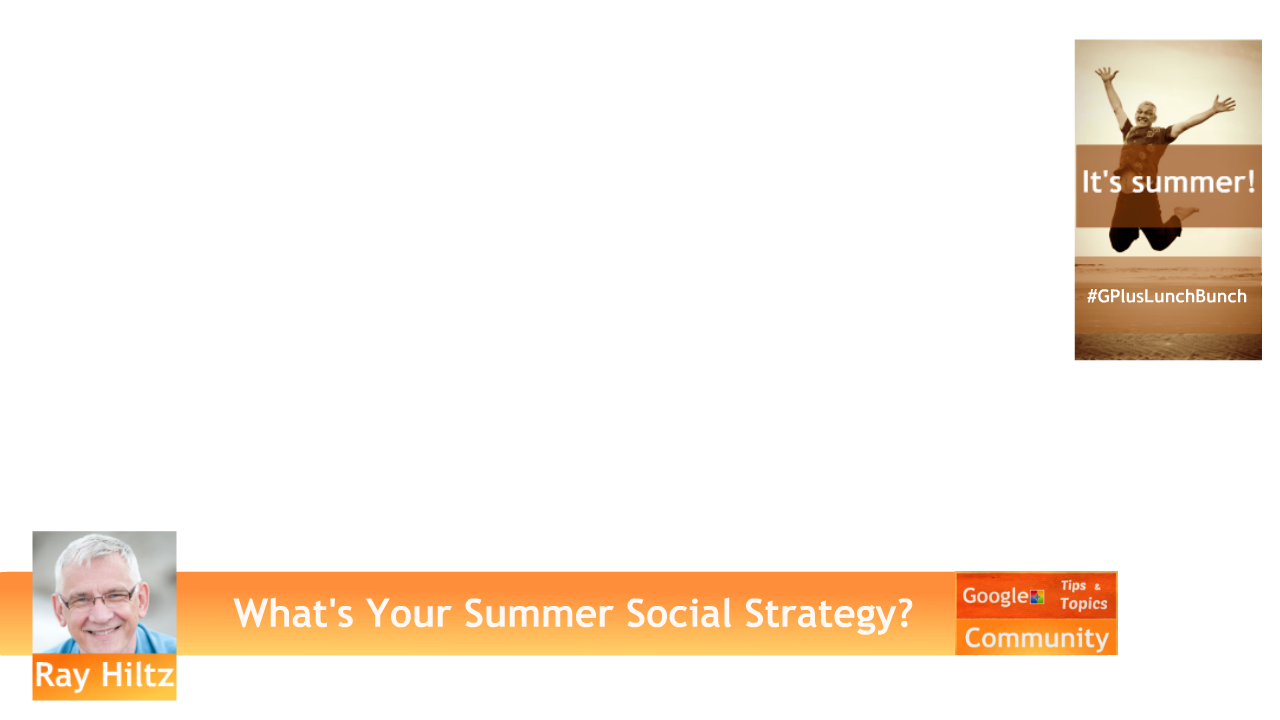
12. Your finished Hangout overlay. Notice all you see are the elements you added.
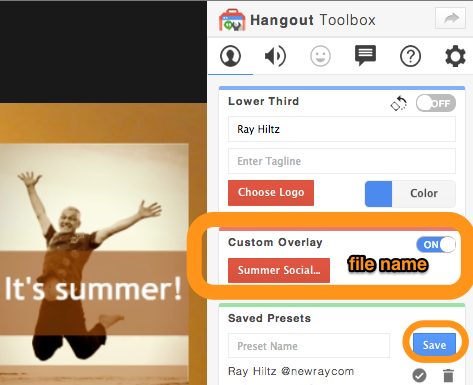
13. Open a Hangout and open the Hangout Toolbox. Go down to “custom overlay”, click on the “custom upload” button and upload the .png file you just saved.
14. Turn the custom overlay feature "on" and check to see if it appears.
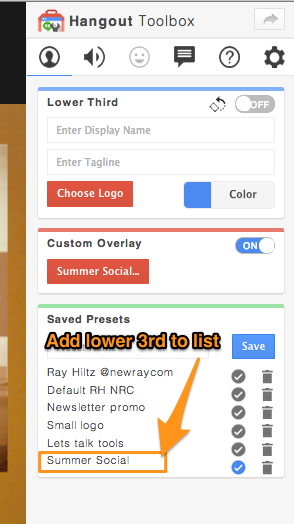
15. While leaving the custom overlay “on”, type the name of the file in the “saved presets” field and hit “save”. The file will show up at the bottom of your "presets" and be available when you open a hangout.
(The toolbox has an option to have the last Lower Third you used to automatically appear when you load a new Hangout. (upper right gear wheel - settings)
The saved presets list is a super tool for accessing special promo graphics that you want to use during your hangouts such as call to actions, web links etc..
I hope you found this helpful. Please share if you and think others might also.
h/t Ronnie Bincer for inspiring the format of this post.
Have a great weekend!
#HangoutLowerThirds #HOA #graphics



No comments:
Post a Comment